20.8% of commercial-vehicle inspections resulted in at least one vehicle out-of-service violation in 2018, according to the FMCSA Pocket Guide, across 2,410,876 inspections. Those figures cover commercial vehicles, not trailers alone, but they show why truck trailer maintenance needs a dispatch decision, not just a completed checklist.
Table of Contents
- Why Trailer Maintenance Decides Uptime and Inspection Results
- Trailer Systems to Check and What Each Check Catches
- How Often to Inspect Trailers Between Services
- Air Brake Checks With Pressure Benchmarks
- Checking Tire Pressure by Position on Dual Assemblies
- How to Inspect Suspension, Doors and Landing Gear
- When a Trailer Repair Needs an External Facility
- Document the Trailer and Confirm Mobile Service Before You Call
Why Trailer Maintenance Decides Uptime and Inspection Results
Federal inspection figures continue to show that a substantial share of commercial-vehicle inspections end with at least one out-of-service finding. Those results span the whole commercial-vehicle population, so read them as a warning about inspected systems rather than a trailer-only rate. For a trailer operator, the practical inference is narrower: a defect in brakes, tires, lights, coupling, suspension, doors or securement can interrupt a run, and the cheapest place to find it is before dispatch.
Hypothetical scenario: A dry van in Lakeland is scheduled for a Tampa delivery the next morning. During the dispatch check, the driver hears air escaping near a trailer connection and reports it before loading begins. The fleet now has a controlled choice: hold the trailer for an air-leak assessment, monitor a minor defect with a named recheck, or release it only after the finding is cleared.
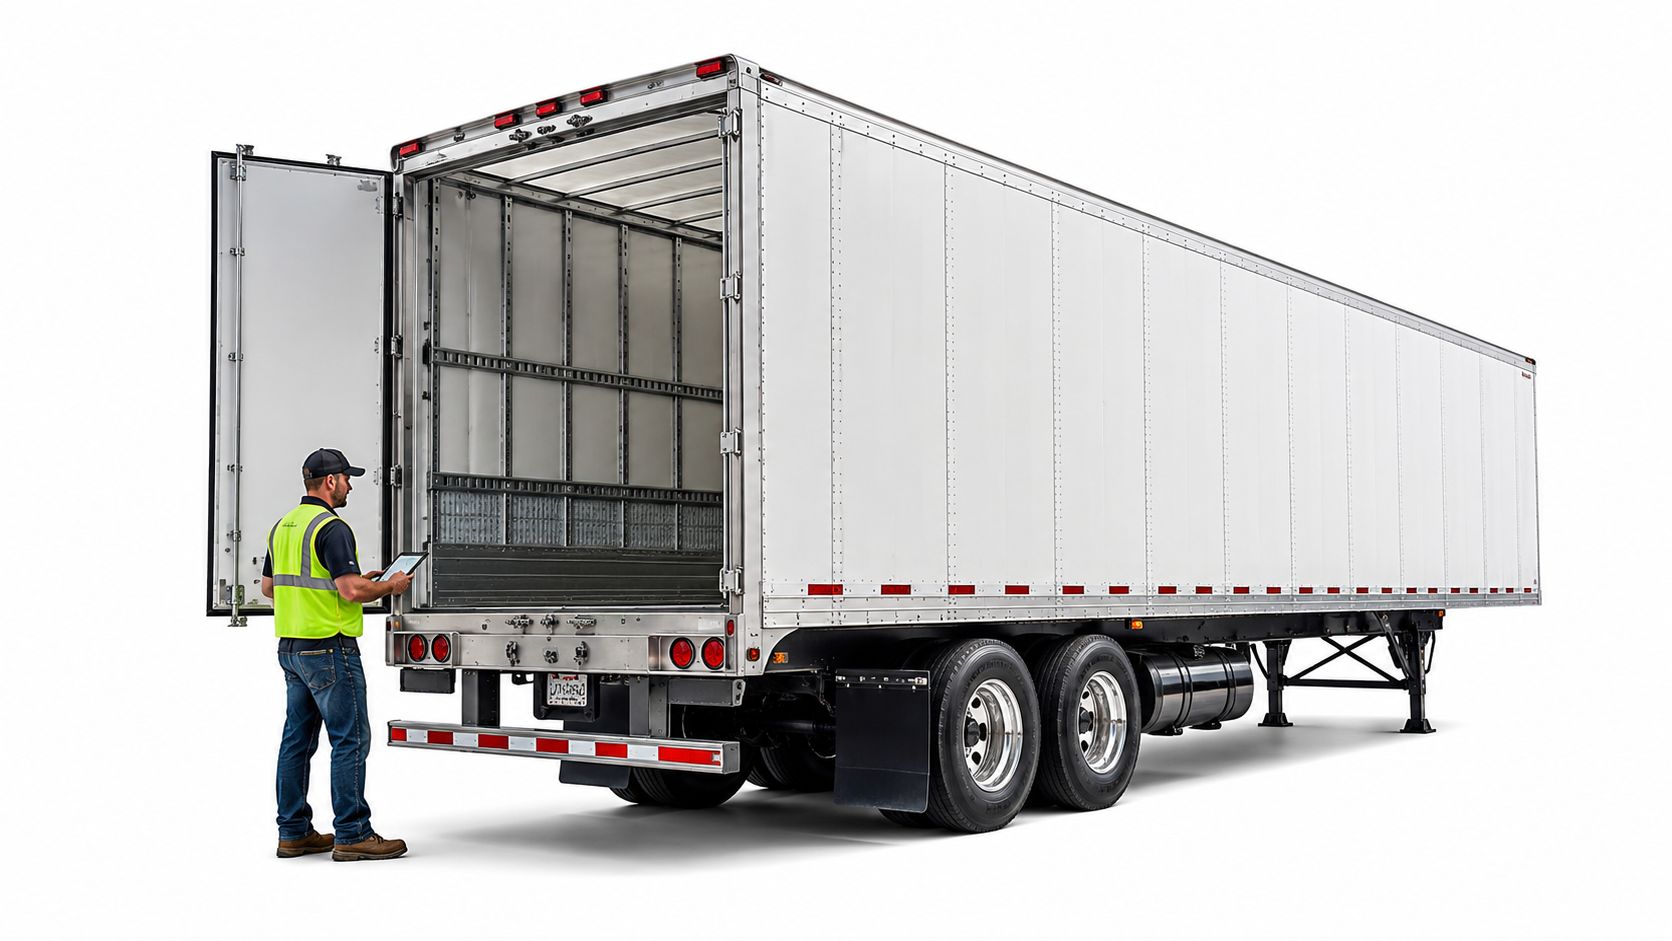
Roadworthy means more than having working lamps and inflated tires. Brakes, wheels, coupling, suspension, doors, landing gear and load-securement equipment need appropriate checks, and unresolved safety defects need a clear hold on dispatch. Sort every finding into three lanes: park now, monitor with a recheck, or move to a suitable external facility.
Practical rule: A completed checklist isn't permission to move a trailer when the findings haven't been evaluated.
Park-now findings can fail immediately or make the trailer unsafe in traffic: active air loss at a brake connection, a visibly damaged tire casing, a coupling defect, a door that will not stay latched, or landing gear that will not hold. Monitor items are stable defects with a defined limit, such as minor seal wear, and each needs a named recheck time rather than a vague note. External-facility items are the ones a roadside look cannot prove, including concealed brake condition inside a drum, structural cracks at hangers or welds, and damage hidden by load or position.
A roadside inspection can identify many accessible defects, but it cannot establish concealed brake condition or structural soundness through a quick visual check. For Tampa and Lakeland operators, early inspection buys control over the repair setting: a planned hold keeps options open, while a checkpoint or roadside failure leaves fewer safe choices and puts the delivery schedule behind the defect.
Trailer Systems to Check and What Each Check Catches
| System | What to check | Symptom to report | Usual mobile feasibility |
|---|---|---|---|
| Air brakes and gladhands | Gladhand seals, damaged air lines, audible leaks, reservoir behavior | Slow brake response, air loss, pulling | Often assessable on site when access is safe |
| Brake friction parts | Lining thickness, drums or rotors, actuator stroke and slack-adjuster condition | Uneven braking, grinding, heat or noise | Adjustment where appropriate may be feasible; drum or rotor work is case-specific |
| Tires and wheels | Cold pressure by position, tread, sidewalls, valve stems, wheel damage | Low-pressure warning, vibration, visible cuts | Pressure and valve checks are often feasible; casing damage may need an external facility |
| Lighting and ABS indicator | Lamps, lenses, connectors, ABS lamp behavior at startup | Dead or flickering lamp, ABS warning | Lamp and connector work is often feasible; harness repair is case-specific |
| Suspension | Springs or air bags, hangers, U-bolts, shocks or equalizers, ride height | Sagging, knocking, off-center tracking | Accessible fastener and component work may be feasible; structural work requires assessment |
| Doors and seals | Hinges, locking rods, handles, seals, closure gaps | Water entry, doors that won't latch | Adjustment and seal work are often feasible on site |
| Landing gear | Crank, leg movement, pads, pins, mounting welds | Binding crank, leg wobble, gear that won't raise | Mechanical service may be feasible; welding or leg replacement is case-specific |
| Coupling and kingpin | Kingpin wear, jaw lock, apron and coupling condition | Shifting, grinding or failure to lock | Inspection is possible on site; kingpin replacement may need an external facility |
The feasibility column describes a type of work, not a service commitment. Firm ground, working clearance, traffic exposure, parts, lifting equipment and the actual defect determine whether a technician can proceed.
Which systems deserve attention first?
Air brakes, friction components, tires, wheels and coupling deserve first attention because a failure can directly affect stopping or trailer control. Lighting, suspension, doors and landing gear follow, although an obvious broken spring or unsecured door immediately changes that order.
Hypothetical example: A driver reports that a loaded trailer pulls during braking. The technician starts with brake response, tire condition and wheel-end evidence, then checks coupling integrity before investigating unrelated lighting or door issues.
The driver's description should remain intact in the report. Replacing “pulls right when braking loaded” with “brake problem” removes information that helps reproduce the complaint.
Find the system, then take the measurement
An inspection should move from observation to confirmation:
- Identify the equipment: Record the trailer number and whether it's loaded.
- Describe the symptom: Include when it started and the operating condition that triggers it.
- Measure the suspected system: Record pressure, stroke, clearance or electrical findings as applicable.
- Assign the disposition: Identify who authorizes repair, monitoring or release.
An automatic slack adjuster that repeatedly needs manual correction requires diagnosis, not repeated adjustment to make the measurement look acceptable. Similarly, replacing a flickering lamp without testing its connector can leave the underlying electrical fault untouched.
How Often to Inspect Trailers Between Services
A trailer needs both frequent operational checks and less frequent measured inspections. Treating the annual inspection as the entire maintenance program leaves too much time for developing defects to go unnoticed.
| Cadence | Inspection focus | Records to keep | Who performs it |
|---|---|---|---|
| Before each trip | Lights, visible tires, brake connections, coupling, doors, load securement | Pre-trip result and defects noted | Driver |
| After each trip | Defects observed during the run | Post-trip report listing defects | Driver |
| Periodic hands-on | Measured brake values, tire pressure by position, suspension fasteners, landing gear | Measurements by axle and position, corrective work | Qualified technician; interval set by fleet policy |
| Annual regulatory inspection | Full inspection of each applicable trailer segment | Inspection report and evidence carried on the vehicle | Qualified inspector under the applicable federal requirements |
Under FMCSA's periodic-inspection requirements, each commercial combination-vehicle segment must be inspected at least once every 12 months, the carrier must retain the report for 14 months, and evidence of the latest inspection must remain on the vehicle. That obligation applies separately to the tractor, semitrailer, full trailer and converter dolly when present.
Separate fleet policy from the legal minimum
Before departure, the driver checks operating condition and reports defects that need assessment. After the run, the driver records changes such as intermittent ABS warnings, brake noise, vibration or doors becoming difficult to close.
Periodic hands-on maintenance should name the interval, scope and person responsible for sign-off. The fleet can set that interval using manufacturer guidance, usage, inspection findings and repair history rather than assuming every trailer needs identical treatment.
Older equipment, intensive regional use and repeated loading cycles justify closer attention as a maintenance judgment, not a separate federal inspection interval. Corroded connectors or recurring suspension complaints can justify advancing an inspection even when the calendar says service isn't due.
The record needs to show what was checked, what was found, what changed and who accepted the result.
A technician's report should preserve actual measurements. A dispatcher should be able to distinguish an inspected-and-released trailer from one awaiting parts without interpreting a vague completion note.
Air Brake Checks With Pressure Benchmarks
A gauge reading on a trailer brake system should sort every finding into one of three decisions: park the trailer now, monitor the value against the benchmark, or send the trailer for work a roadside check cannot complete. Gladhands, air lines, reservoirs, service and emergency controls, ABS indication, actuators, slack adjusters and friction components all draw on the same air supply, so the numbers only matter when tied to a release decision.
FMCSA's brake-maintenance requirements address safe operation of brake components, trailer emergency-brake activation and applicable antilock-braking requirements. A defect affecting safe operation or likely to cause mechanical breakdown must be corrected before dispatch, which means a failed check here keeps the trailer parked.
The FMCSA brake safety systems guidance sets the pressure benchmarks below.
| Check | FMCSA benchmark | What a miss suggests | What to record |
|---|---|---|---|
| Compressor cut-out | Generally between 110 and 130 psi | Governor, compressor-control or supply issue requiring diagnosis | Cut-out reading and gauge location |
| Compressor cut-in | About 20 psi below cut-out | Possible governor setting or control problem | Cut-in reading |
| Pressure build-up | 85 to 100 psi in 45 seconds or less | Leakage, weak air supply or restriction | Time at each pressure and elapsed build-up time |
| Two-minute pressure hold | Loss below 5 psi, engine off, ignition on, parking brake released, full application held | Leakage involving a service line, reservoir, valve or another connected component | Start and end pressures and test configuration |
| Low-air warning | Activates before pressure falls below 60 psi | Warning circuit, sensor or setting problem | Pressure when the warning activates |
These are combination-system observations. The tractor supplies the compressed air, so a gauge figure alone leaves open which side of the connection holds the fault. A reading inside the limit still earns a place in the record when it drifts between tests: hold loss that grows from one service to the next becomes a monitor item with a stated recheck point.
Interpret a failed reading without guessing at parts
Hypothetical example: Build-up meets the listed benchmark, while the application-hold pressure loss exceeds the limit. That pattern directs attention toward leakage rather than immediately condemning the compressor, and the trailer stays parked until controlled testing locates the loss.
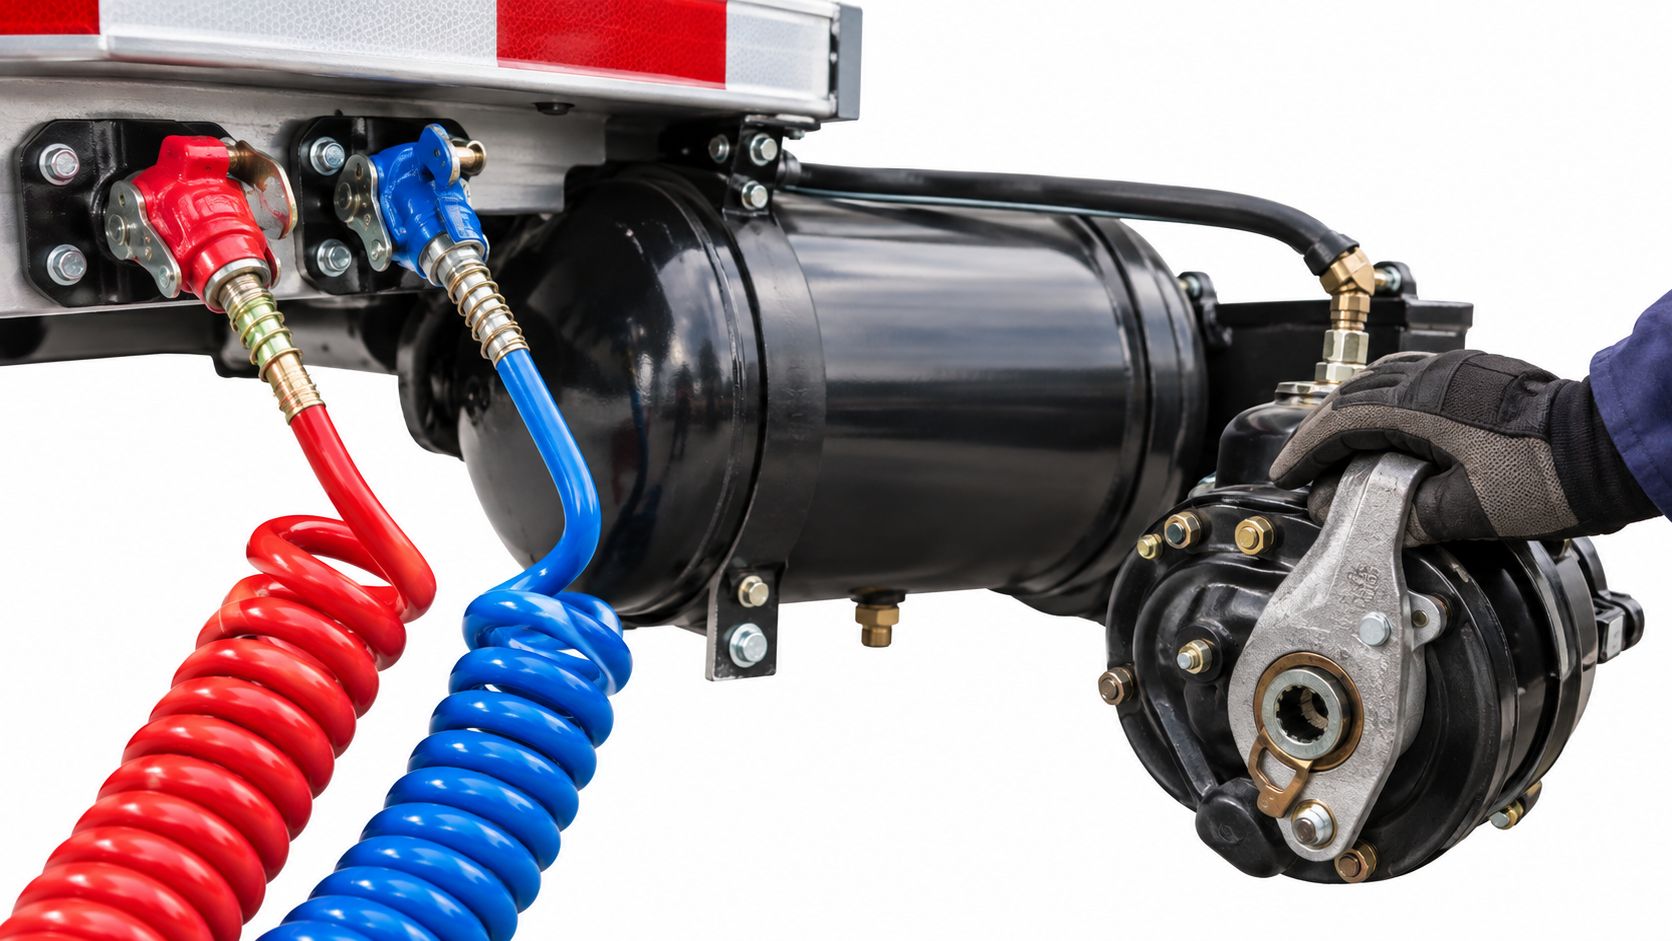
The technician should inspect accessible connections and listen for escaping air while keeping clear of moving components. A leak-detection solution can identify an accessible leak. Silence at the fittings clears only what the ear can reach, so valves, chambers and concealed plumbing still need controlled testing to confirm their condition.
An accessible slack adjuster is only part of the inspection.
Set up safely and preserve the findings
Before any test involving parking-brake release, the vehicle must be secured against movement. Nobody should crawl underneath unsupported equipment or disconnect pressurized components to investigate a sound.
The report should include:
- Test conditions: Tractor and trailer identification, gauge used and brake configuration.
- Measured results: Cut-in, cut-out, build-up time and application-hold readings.
- Functional observations: Warning-lamp behavior, audible leak location and service-brake response.
- Repair verification: Corrective work and the results of the repeat test.
The air-brake leakage-test guide provides additional context for recording a controlled test. Pass the pressure checks, then inspect linings, drums, actuator stroke and wheel ends for contamination before release. A leak that listening and solution cannot locate, or a fault inside a chamber or valve, goes to a facility equipped to open the system up.
Checking Tire Pressure by Position on Dual Assemblies
An NHTSA-hosted tire-pressure survey found pressure differences greater than 5 psi in approximately 20% of tractor dual assemblies and 25% of trailer dual assemblies; about 7% of all tires were underinflated by 20 psi or more. In that survey, the severe-underinflation rate reached 19.1% in fleets with 50 or fewer power units, compared with 2.1% in fleets operating more than 3,000 power units.
No survey predicts what a particular Florida fleet will find on a given morning. These figures still make the case against approving duals by looking only at the outside tire: an inner tire can run low while the assembly looks serviceable from the curb.
Keep a record for every position
Cold pressure means pressure measured before the trailer has been driven. The target must match the tire, loading and equipment guidance rather than a number carried over from another trailer.
A position-level record should include:
- Location on the trailer: Axle and inner or outer tire position on each side.
- Pressure: Actual cold reading, applicable target and difference within the dual.
- Condition: Tread-wear pattern, sidewall cuts, casing damage and valve-stem condition.
- Operating context: Loaded or empty status, exact vehicle location and warning history.
That record does the work a pressure alert cannot: it shows whether a low reading is new, recurring or paired with casing damage, and that pattern decides the next step. The technician needs a suitable calibrated gauge and access to both valve stems. Kicking a tire or reading only the tire-pressure display is not a measurement.
An NHTSA-hosted tire-maintenance bulletin reports that only 44% of truck tires were within 5 psi of target pressure and attributes nearly 90% of tire failures to underinflation. It also states that 20% underinflation can reduce tread life by 25% and fuel mileage by 2%. Consistent records are what let a fleet catch chronic underinflation before a tire reaches the failure category.
Sort findings into a triage order
Some findings park the trailer where it sits. A substantially underinflated tire is the clearest case: adding air to a casing that may have flexed under load for miles can create a hazard, and a visual check cannot prove the sidewall structure held. That tire gets an assessment before inflation, and it stays out of service until a technician confirms it is safe to reinflate.
Other findings go into the record and onto the watch list. A modest pressure spread between duals, early uneven wear or a first-time warning on an otherwise sound assembly can be monitored across the next several checks, provided the record captures the trend rather than a single snapshot.
A third group exceeds what a roadside or yard visit can settle. Removing or mounting a tire brings lifting-equipment and traffic-clearance requirements, and a damaged casing, a wheel problem or an unsafe shoulder all push the job to an external tire facility. Pressure measurement and visual inspection are often practical at a safe yard location; the written record is what assigns each tire to one of these three paths.
Tire checks also feed brake and suspension diagnosis. Record unusual heat, localized wear or vibration alongside the pressure readings instead of treating them as unrelated complaints.
How to Inspect Suspension, Doors and Landing Gear
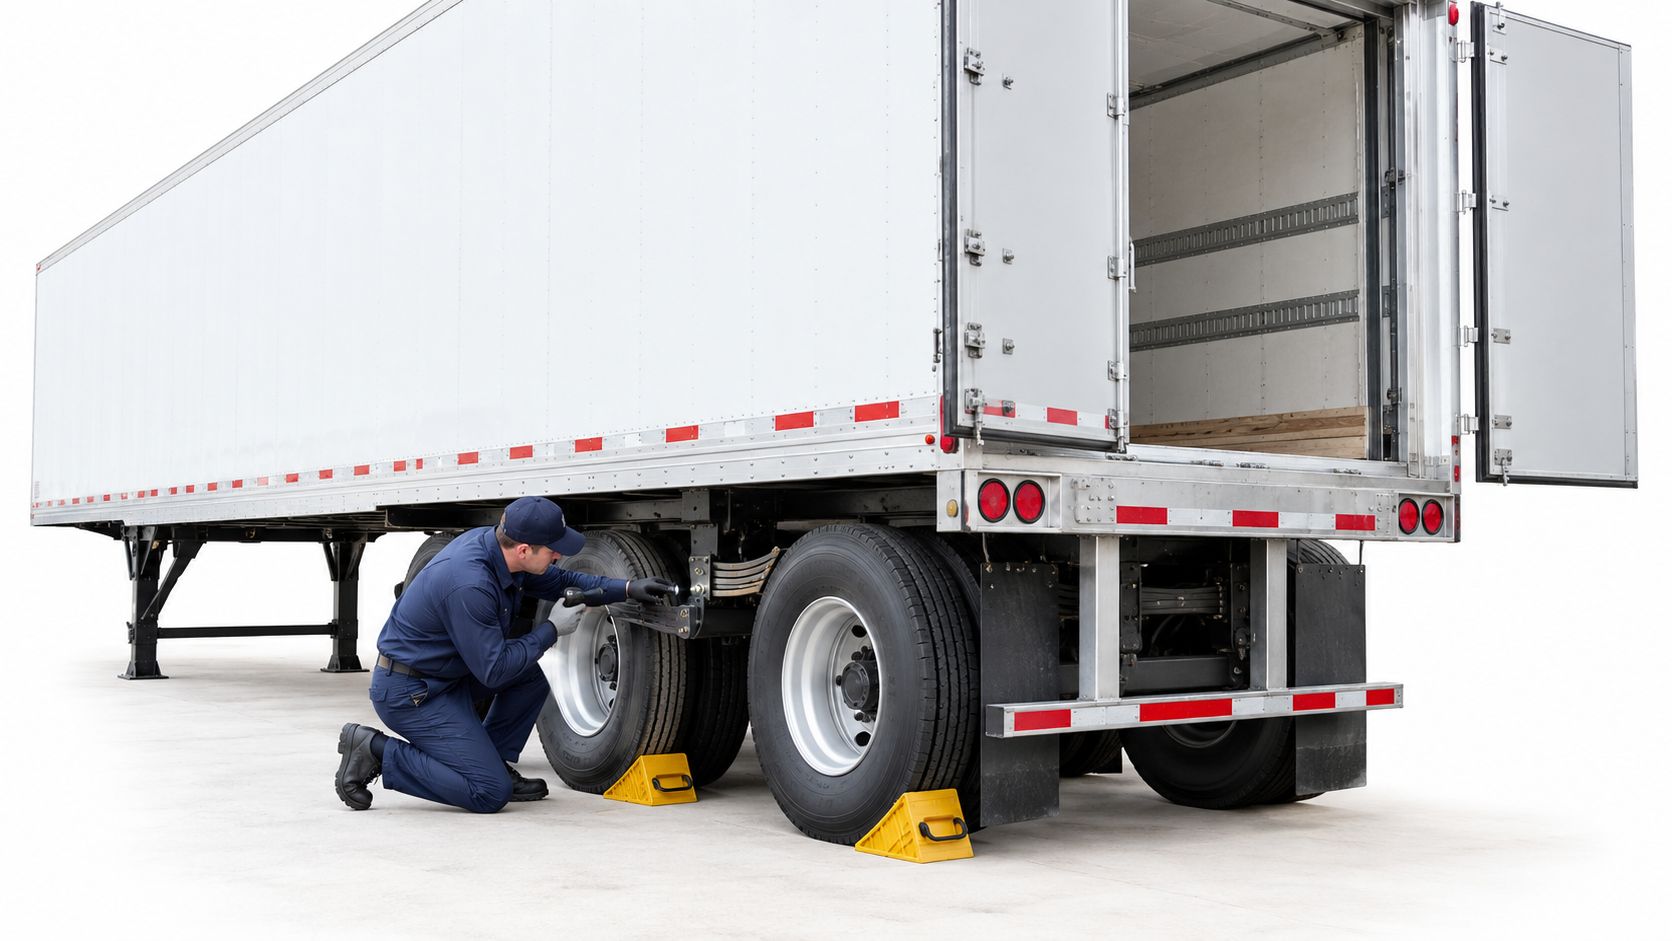
A stable trailer and a safe inspection position come before component checks. A walkaround can identify warning signs, but nobody should enter a crush zone to obtain a better photograph.
The undercarriage inspection requires clear access and appropriate support.
Follow a controlled inspection sequence
Establish stability. Park on firm, level ground, chock the wheels and confirm the trailer is supported before inspecting underneath. Air suspension and landing gear aren't substitutes for correctly rated support, and unstable ground is a stop condition.
Operate the landing gear without forcing it. Check crank operation, even leg movement, pads, pins, mounting bolts and visible welds. Binding can indicate gear wear, misalignment or loading problems; extra force can worsen the fault rather than explain it.
Check complete door closure. Inspect hinges, locking rods, handles, seals and closure gaps, keeping clear of doors that could move unexpectedly. Forcing a reluctant latch can bend hardware and conceal a distorted opening or shifted load.
Inspect suspension components. Look for broken springs, damaged air bags, worn hanger bushings, loose-fastener evidence, shock damage and equalizer wear. Compare ride height side to side under consistent conditions, and verify fastener torque against the applicable specification rather than tightening by feel.
Look for axle movement. Compare tire-wear patterns and inspect attachment points for displacement, polished movement marks or damaged hardware. Off-center tracking is a reason for further assessment, not proof that alignment alone will correct the problem.
Test rear lighting with a helper. Check stop, turn and marker lamps, cracked lenses and connector seals while the vehicle remains secured. A lamp that works when the harness is held still but flickers when moved needs wiring diagnosis, not just another bulb.
Assign a result to each item. Record pass, monitor or defect, supported by a measurement where appropriate and photographs from safe positions. Every monitored finding needs a named reviewer and a defined recheck, not an open-ended note.
Know where the walkaround ends
The semi-trailer suspension repair guide describes related suspension concerns. Ride-height symptoms can originate in load distribution, air controls or mechanical damage, so replacing the most visible worn part without checking the rest can leave the complaint unresolved.
The following video accompanies the inspection discussion; physical work still requires equipment-specific procedures and safe support.
A cracked structural member, a leg that won't support its load or a door that can't be secured requires a qualified assessment before movement. These aren't routine adjustment findings, and a roadside location doesn't become suitable merely because the damaged component is accessible.
When a Trailer Repair Needs an External Facility
The decision is whether the repair can be completed safely at that location with the necessary parts, equipment and support. Technician access alone doesn't answer that question.
| Scenario | Mobile assessment | Suggested next step |
|---|---|---|
| Hypothetical: air loss persists during an application hold on a roadside shoulder | Diagnosis limited by shoulder safety; line or brake-component work is case-specific | Keep parked; use an external facility if safe on-site repair isn't feasible |
| Hypothetical: one dual tire is substantially low with no visible damage | Pressure, valve and casing assessment may be feasible with safe access | Correct only after assessment; recheck before release and use an external tire facility if damage is found |
| Hypothetical: tread cut exposes cord on a highway shoulder | Traffic exposure and tire-removal requirements limit work | External tire option if on-site replacement isn't safe; movement method decided separately |
| Hypothetical: a stop or tail lamp is out and its connector is corroded but intact | Connector testing, cleaning, resealing or lamp replacement may be feasible | Repair required lighting before dispatch |
| Hypothetical: crack beside a crossmember or frame-rail mount | Structural assessment required; unsuitable for an assumed roadside weld | Keep out of service pending qualified structural assessment |
| Hypothetical: landing-gear crank binds and a leg wobbles | Assessment possible with safe support; leg or mounting repair is case-specific | Use an external facility when required support or replacement can't be provided on site |
| Hypothetical: coupling inspection finds kingpin wear | Measurement possible on site; replacement is case-specific | External facility if kingpin or jaw replacement can't safely be completed at the location |
Classify findings before authorizing dispatch
Park now applies to unresolved brake air loss, cracked structure, insecure doors and landing gear that can't be secured or safely support the trailer. A dispatcher shouldn't substitute a delivery priority for a technical release.
Monitor applies only after the finding has been assessed as safe and compliant. For a corrected low tire without identified damage, the assigned technician should document a pressure recheck before release, with the driver checking again at the next pre-trip; any renewed loss returns it to repair assessment.
A cosmetic lens issue may qualify for monitoring if lamp operation and secure mounting remain acceptable. The driver should recheck it at the next pre-trip, and the maintenance coordinator should sign off the planned correction. An inoperative required lamp isn't a monitor item.
External facility describes the repair setting, not permission to drive there. The Tampa trailer-repair overview provides local service context, but movement authorization remains defect-specific.
Keep the external option separate
SAAT's Road Services model involves assessment at the vehicle location, not an invitation to a company workshop. A suitable external option could be a qualified trailer facility, tire facility or structural repair shop, none of which should be represented as a SAAT location.
No towing method is assumed. How the trailer moves is a separate safety decision based on its condition and location, and structural or brake concerns require a qualified release before movement.
Document the Trailer and Confirm Mobile Service Before You Call
A dispatcher who calls with "the brakes feel weak" starts a slower conversation than one who reports a measured air-loss rate and a trailer already parked. The difference is the record: enough detail for the technician to judge access, tooling and repair scope before attending, and enough for both sides to agree on triage before anyone rolls.
Photographs help, but they support measured findings rather than replace them, and none of them justify a driver standing in traffic. The call-ready record should contain:
- Trailer identification: Unit number, identification details and loaded or empty status.
- Complaint: The driver's wording, when it started and the conditions that trigger it.
- Triage status: Whether the finding parks the trailer, can be monitored to the next pre-trip, or already points to an external facility, plus who made that call.
- Measured results: The air-brake test figures and per-position tire pressures recorded during the earlier checks, quoted as measured.
- Inspection history: Latest periodic-inspection date and where the report is kept.
- Access information: Exact location, available working space, surface condition and traffic exposure.
- Safe photographs: Overall location and close-ups taken without entering hazardous areas.
Confirm the working conditions
SAAT Repairs Corp works as an independent mobile Road Services team across Tampa, Lakeland and nearby Florida. Technicians attend the vehicle location, and SAAT has no customer-facing workshop, so every request starts with an on-site feasibility assessment.
The mobile scope covers diagnostics, brake system inspection and repair, electrical component service, DPF and EGR work, software programming and preventive fleet maintenance. Structural repair, such as frame or crossmember damage, sits outside roadside scope and goes to a qualified external facility. Emergency road service runs 24 hours a day, 7 days a week, with a stated target of roughly 45-60 minutes inside the Tampa and Lakeland areas depending on location and traffic; operators outside that area should confirm coverage first.
SAAT Repairs Corp provides mobile assessment and repair across brake, electrical, emissions and software systems for heavy-duty commercial vehicles, alongside preventive maintenance for fleets. With the trailer's identification, triage status, measured findings and access notes ready, operators can visit SAAT Repairs Corp, available in English and Spanish, to confirm coverage and describe the finding.